WEIGHT LOSS & FITNESS BLOG

Barbell Power Clean
Let’s break down the barbell power clean!
If you have ever trained or are currently training with us at BFP, you know we love to program barbell power cleans. In fact, it is one of my favorite lifts to coach! In the beginning stages, it can feel awkward because it requires speed, coordination, mobility, and kinesthetic awareness. Once you get past the learning curve, this is where you can build on strength and power with the lift.
Power cleans are not secluded only for athletes, weightlifters, or crossfitters. I firmly believe this lift can be performed by most gym-goers, even if it’s not with a barbell, you can still replicate the movement with other implements (kettlebells, dumbbells, medicine balls). With that being said, I would highly recommend having an educated coach teach you and make sure you are doing it correctly and safely.
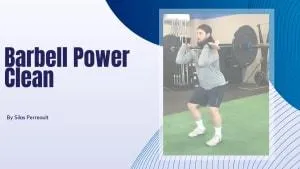
Ok, let’s discuss what the barbell power clean looks like in a sequential snapshot. There are six phases to the lift, so what I did was break down each phase for a better understanding because the movement happens so fast, it’s hard to pick up on certain things when watching it in real time. I would challenge that even if you are already efficient with the movement, you may pick up on something you didn’t know. If you are new to this lift, take note of each position as the bar moves up.
The six phases of the barbell power clean
1. Starting position- Before initiating the first part of the movement, proper setup is key. Take your time and don’t rush the set-up.
-With the barbell just in front of your shins, stand with your feet slightly wider than shoulder width, toes pointed slightly outward. This allows your knees to track directly over your feet.
-Squat down and grasp the bar with a grip slightly wider than shoulder width and your hands facing your legs.
-Your arms should be just outside your knees and fully extended, with your shoulders just slightly in front of the bar.
2. First pull- This is where a few errors can happen, so the big takeaway is to keep your arms straight as your hips and shoulders rise at the same time. One more thing, don’t rip the barbell off the floor in a “jerky” motion, this can cause you to lose a lot of body tension.
-While maintaining a strong torso, forcefully extend your hips and knees to drive the bar off the floor, keeping the bar close to your body. Your hips and shoulders should rise at the same rate.
-Keep your arms extended, heels on the ground, and shoulders slightly in front of the bar as the bar travels upward.
-The weight should be distributed throughout your entire foot.
3. Transition (scoop)- Get ready to jump as you scoop the barbell towards your hips.
-As the bar rises above your knees, thrust your hips forward, bending your knees slightly and shifting your weight toward the front of your feet, to move your thighs against the bar.
-This sets you up for a powerful second pull.
4. Second pull (power)- This is where the “magic” happens. Be explosive on the jump and keep the barbell close to the body as you pull high with your elbows.
-As the bar comes off of your thighs, explosively extend your hips, knees, and ankles. Keep the bar close to your torso.
-As your hips, knees, and ankles extend, rapidly shrug your shoulders and flex your elbows to pull your arms and body under the bar.
5. The catch- Make sure you punch your elbows through and sit down as you catch the barbell on the shoulders. Stand up to finish.
-Drop into a partial squat position, keeping your torso strong and erect.
-As your body comes under the bar, your arms and hands should rotate around and under the bar to create a shelf — hands facing upward, elbows fully flexed, and upper arms parallel to the floor.
-After gaining control and balance, stand up tall, with the bar in the catch position on your shoulders and clavicle.
6. The return- Be mindful to not let the barbell rip you down to the floor, or if it’s super heavy, drop the barbell making sure to smother it so it doesn’t bounce up and smack you in the legs.
-When you’ve completed the rep, rotate your hands back around the bar to remove it from your shoulders. Gradually lower the bar back down to your thighs.
-Simultaneously flex your hips and knees to lower the bar back down to the floor.
-Set up the bar for the next rep.
Link to video: Barbell Power Clean
Hopefully now you have a better understanding of what should be happening at each phase of the power clean. Just like any exercise, this lift takes consistent practice, but overall, I believe this lift can benefit you outside the gym in your daily activities and provide an empowering experience in the gym.
“Happy Lifting”
Coach Silas


Are you Ready to become
sTRONG - FIT - cONFIDENT?
Click the Button To Start Your Journey Today!!

