WEIGHT LOSS & FITNESS BLOG
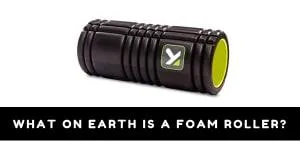
What On Earth Is A Foam Roller?
Many people come into the gym and are ready to hop right into their workout. Sometimes I do too. However, what we don’t realize is…
“Foam rolling is a NECESSITY”
Why is that?
There are numerous benefits from foam rolling which is why we should make it part of our daily routines. Especially if working out on a daily basis or pretty often throughout the week.
“Have you ever heard of self-myofascial release?”
Sounds fancy but in other words, it basically means a self “MASSAGE.” Hope this grabs your attention!
Let’s first think of not only how convenient it is to do a self-massage at home, BUT you don’t have to pay so much money anymore!
Back to the topic.. Myofascial release is a way to relax any tension buildup in the muscles. Especially the sore ones. While rolling through your muscles, you are allowing blood to flow through which actually helps with muscle soreness. Well maybe not at the very moment of rolling a sore muscle (if you know, you know..), but you will definitely feel a relief in tension shortly after foam rolling. Now think about how you feel after that sore muscle feels loose again? You now have… BETTER RANGE OF MOTION! Working out with a super tight muscle is never a great feeling, and can sometimes lead into an injury which is why we try and stress foam rolling here at BFP.
“When should I foam roll?”
Foam rolling is great to perform before and/or after a workout. I like to prescribe major muscle groups for before a workout to release any tension as well as allow early blood flow leading into the warm-up. After a workout is usually an opportunity to work on early muscle recovery. For example, if you know you stressed the quads a ton that day, roll out the quads.
“How do I foam roll?”
Below are a few pictures with brief descriptions of what muscle is being rolled out and how to set yourself up. Each muscle should be rolled back and forth about 10 times.
Calf→ Place right leg over the foam roller. Place hands on floor beside your bottom (make sure hands are directly underneath the shoulders). Lift hips up and begin to roll from slightly above the ankle to slightly below the knee. Repeat the same process for the left calf
Hamstring → Place right hamstring (back part of the thigh) over the foam roller. Place hands on floor beside your bottom (make sure hands are directly underneath the shoulders). Lift hips up and begin to roll from slightly above the knee to slightly below the butt. Repeat the same process for the left hamstring.
IT band → Lay on your right side and place foam roller on the upper side of the thigh. Cross your left leg over and plant foot flat on the floor. Place your elbow directly underneath the shoulder. Begin rolling from slightly above the side of the knee to the bottom of the side of the hip. Repeat this process with the left hamstring.
TFL → Lay on your belly and place foam roller by the front crease of your right hip with your right leg fully extended.. Place your left knee towards the side of the foam roller. Roll back and forth slowly across the front of the right hip. Repeat this process with the front crease of the left hip and left leg fully extended.
Glutes (butt) → Imagine wearing jeans with back pockets. Lean over to your right pocket side and cross your left foot over your right knee. Roll back and forth one glute and repeat the same process on the left glute with the right foot crossed over the left knee.
Thoracic spine → Lay on your back and place foam roller right underneath your shoulder blades. Keep your legs bent and lift the hips up. Give yourself a big hug and roll halfway down the back and back up again.
Thanks!
Coach Iris
Are you Ready to become
sTRONG - FIT - cONFIDENT?
Click the Button To Start Your Journey Today!!

